When uploading journals you have created in excel
Step-by-step guide
First create the journal in excel
- Mandatory Columns in the spreadsheet (use these headers)
- Date (of journal)
- Account
- DR
- CR
- Optional columns that can follow mandatory columns in the spreadsheet (use these headers)
- Tax Code
- GST inc (0 or 1)
- Link (from list on Journal - Order, Event, Asset, BusinessEntity, StockTranItem, Stock, ItemForSale, CompanyDivision, Brand) - note Brand will link to the supplier.
- Search code (eg for a brand that would be the supplier search code in the system
- Notes
- Qty
- Amount
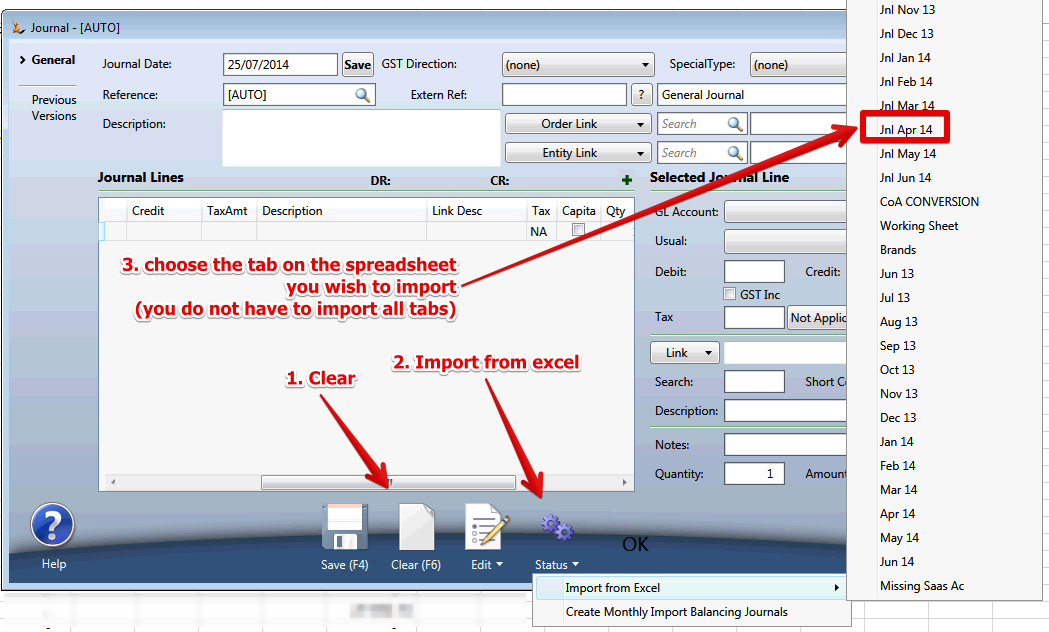
Once the journal is ready to import
- Drag the XLS over the grid in General Journal
- A confirmation will ask if you meant to do this
- A confirmation will confirm the file is available for the session you are logged in for (if you log out you will need to do upload the file again)
- Action > Import from excel > Choose the tab on the spreadsheet you wish to import
- Journal screen will populate
- Save
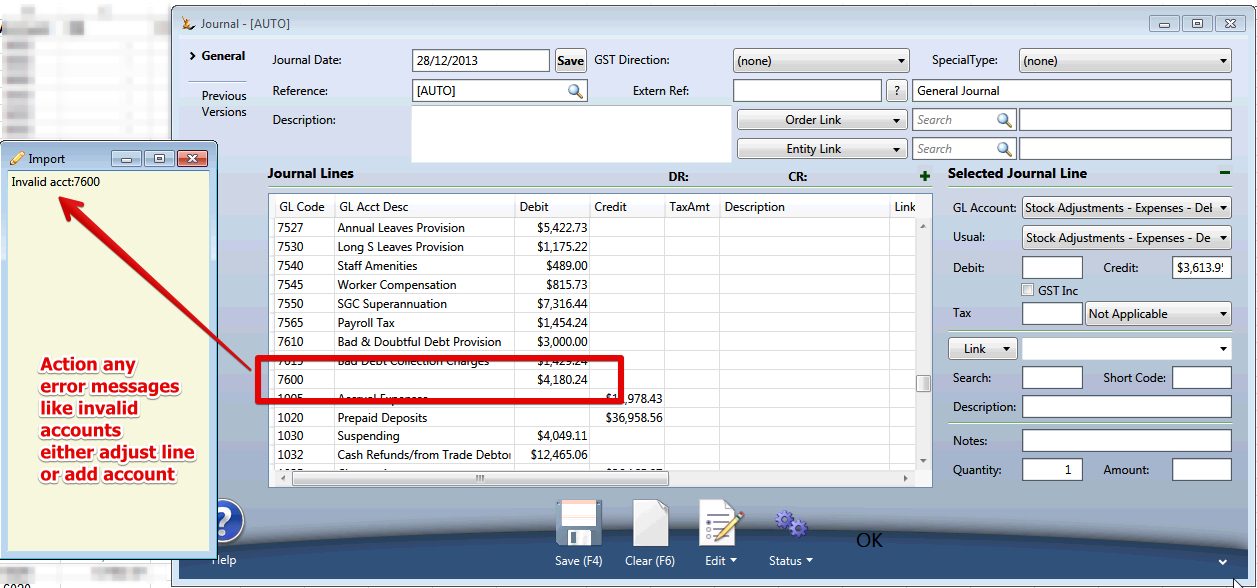
- If the journal does not balance you will get an error message and journal will not save
- If there are GL accounts the system does not recognise
- The journal will not save
- A note will popup with a list of the problems
- There will be an indicator on the lines in the journal for you to review / adjust
- If there are values outside a reasonable range (example very small values like 0.0000000000001
- The journal will not save
- A note will popup with a list of the problem accounts - review and adjust
- Save the Journal
- Clear
- Import the next tab.
Related articles
Filter by label
There are no items with the selected labels at this time.