Table of Contents
Overview
Move orders take stock from one warehouse to another warehouse that you own.
The stock is picked and placed into a staging location. From here you can palletise and await the arrival of the vehicle
When the vehicle arrives - print the waybill and confirm the stock has left.
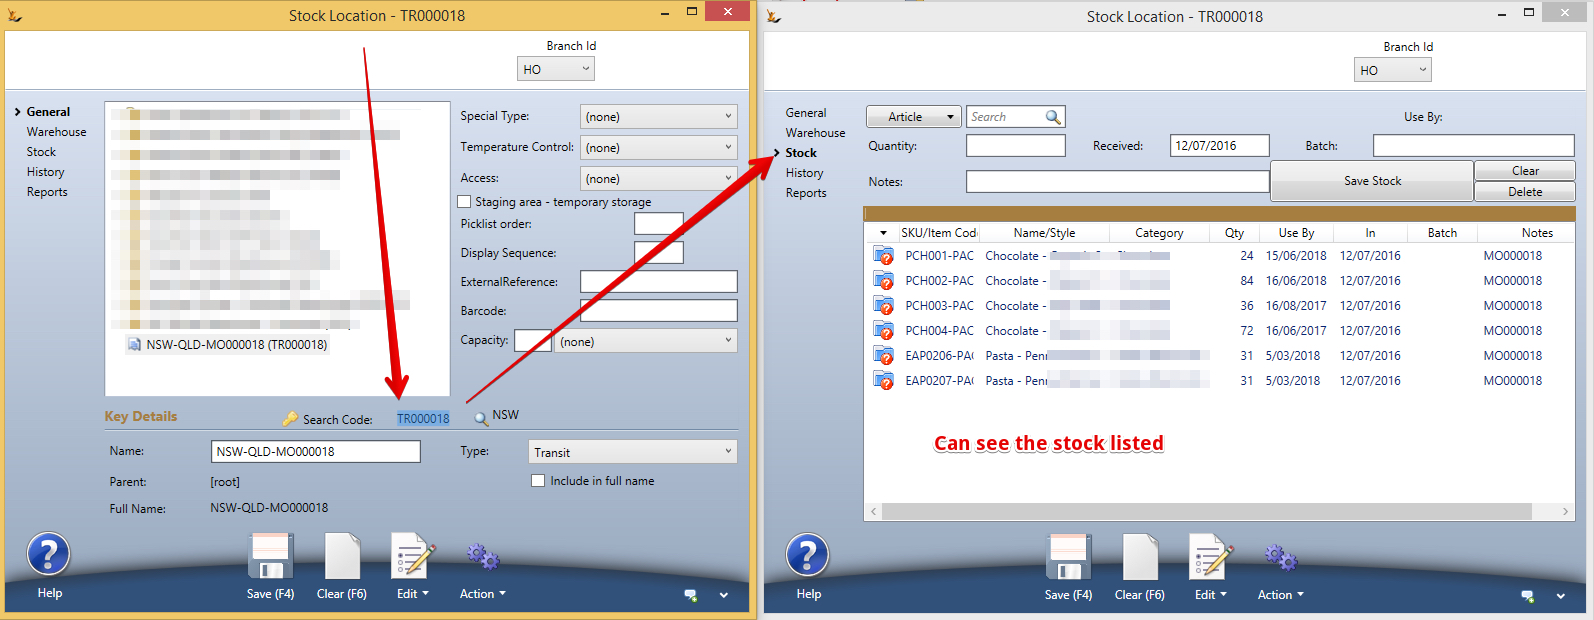
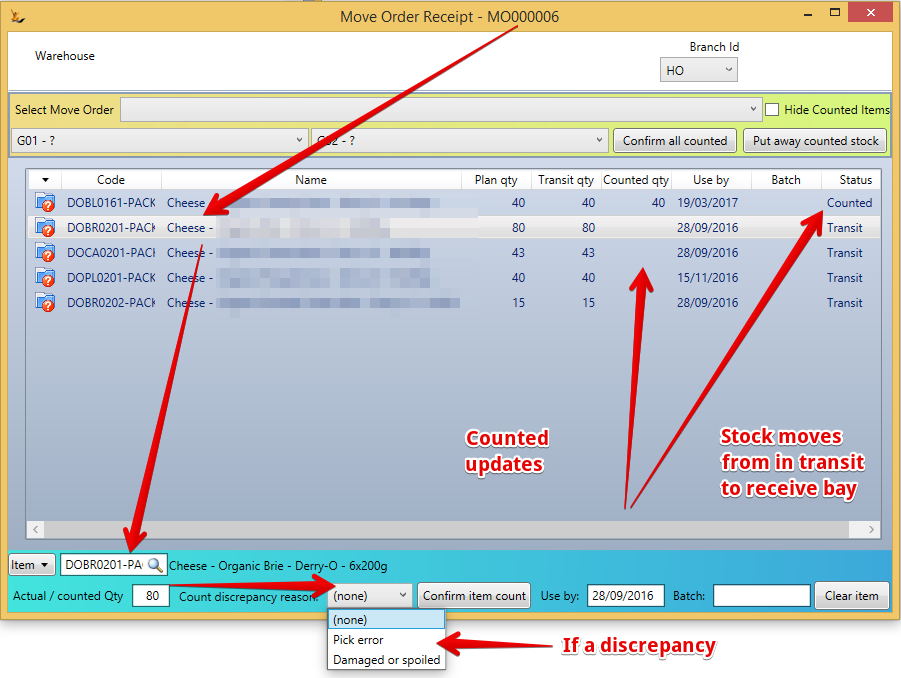
When the stock leaves the first warehouse it is placed into a temporary transit location until it arrives at the new warehouse
- Hence the value of the stock is still in stock, it is visible and you can see the value of the shipment at any time
When the stock arrives in the new warehouse it is taken off the vehicle and placed into a staging location
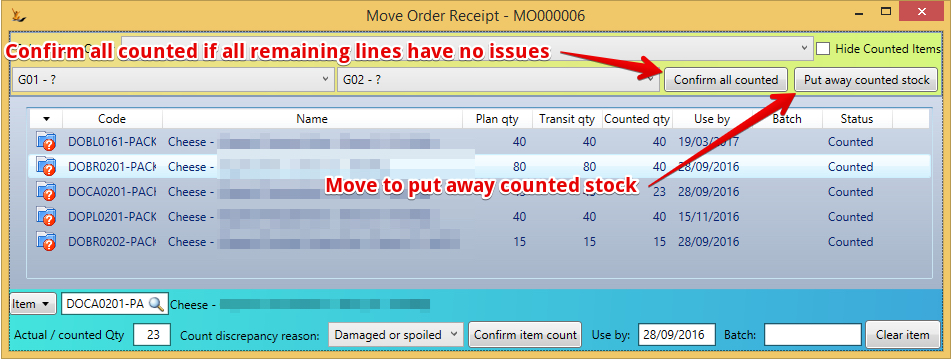
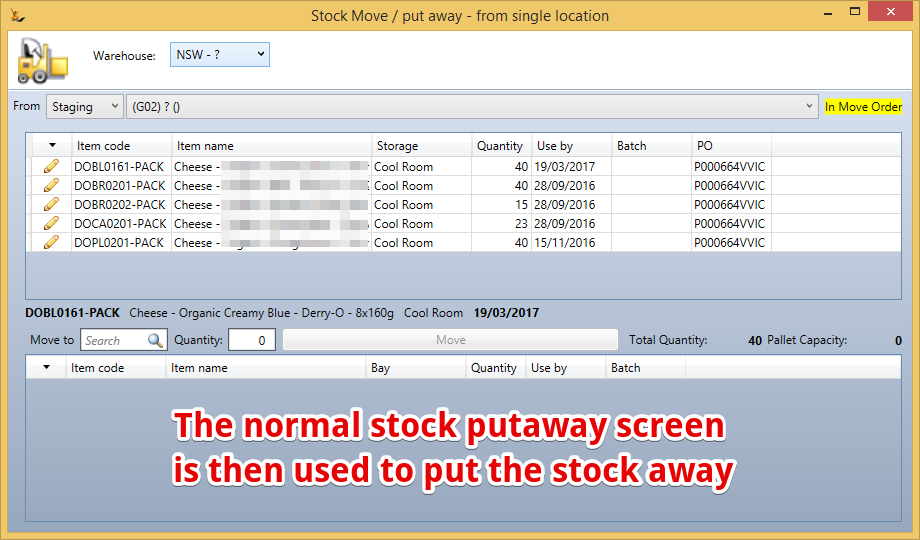
The stock is then moved from the staging location into the warehouse locations using defaults based on stock preferred storage locations
Creating Move Orders Manually
Select the From and To Warehouses
Select the Expiry Date limitations
Will be in planning status = must be moved to Planned status in order to be picked
The system will find the stock with the shortest expiry date that does not breach the Expiry Date Limitations
Enter the Stock Articles that are to be moved and the quantities
Move orders created by Purchase Orders - Warehouse Distribution
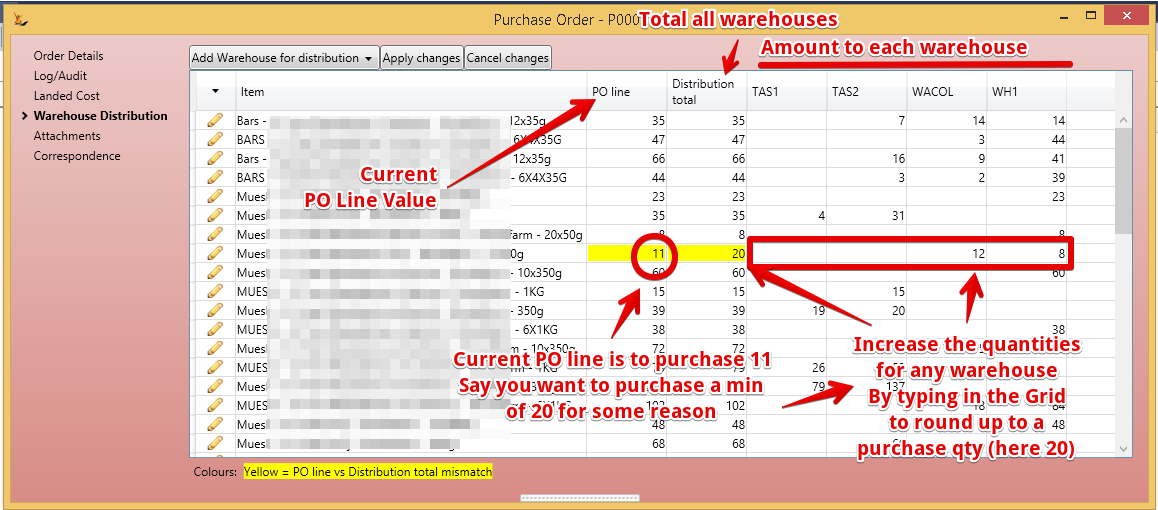
The Purchase Order > Warehouse Distribution Tab indicates where the stock is to be sent
The stock will initially Land at the Warehouse nominated by the Purchase Order
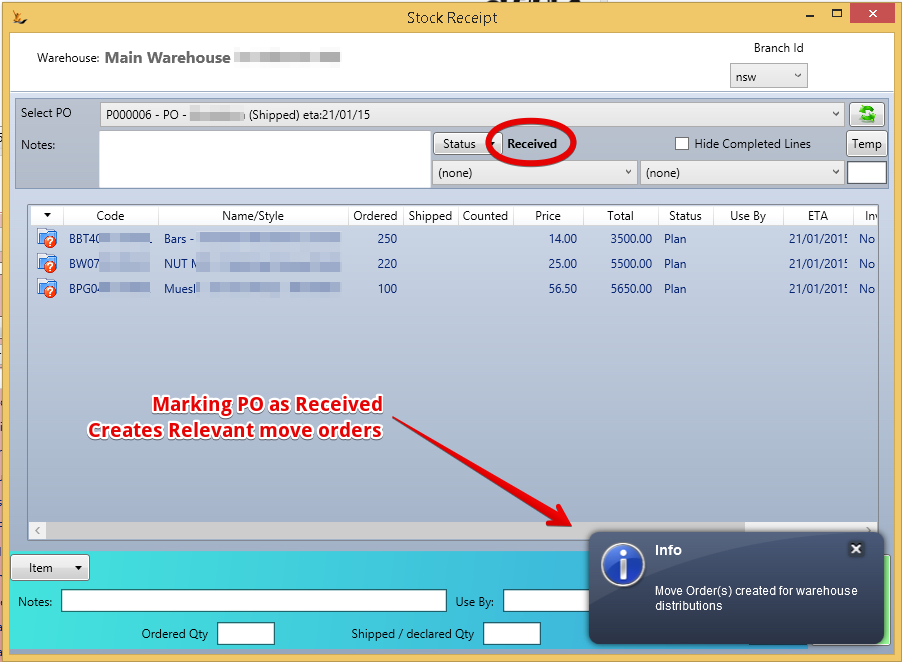
Move orders will be created when last item has been counted and will be in Planned Status. Move order will open to pick immediately.
Each Supplier Delivery to any warehouse is a single purchase order - a Purchase order cannot be delivered to multiple Warehouses by the supplier
Move orders to be dispatched on the Warehouse Dashboard
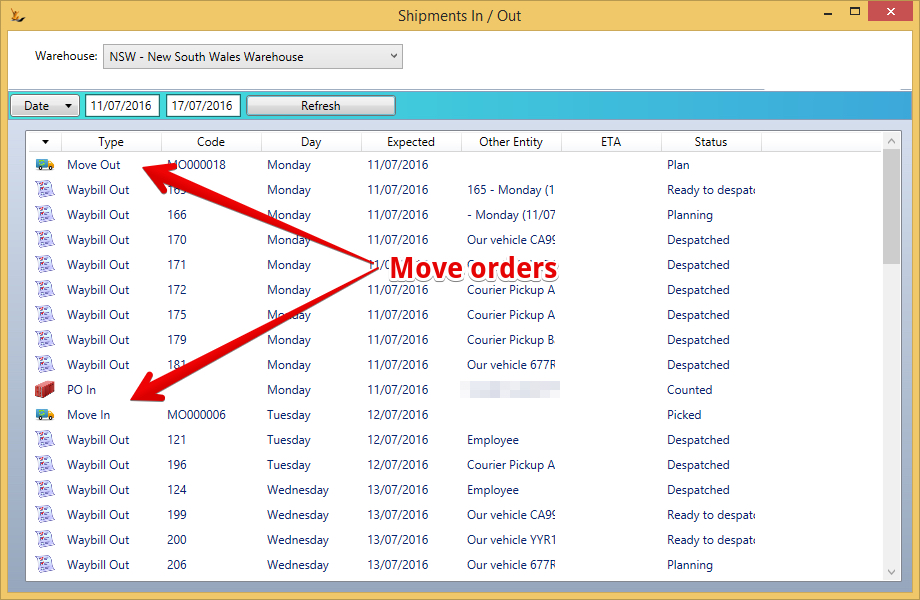
Move Orders that are to be dispatched will list on the Warehouse Dashboard
Nominate a time you expect the carrier to arrive to assist in planning the day as the list is sorted by ETA
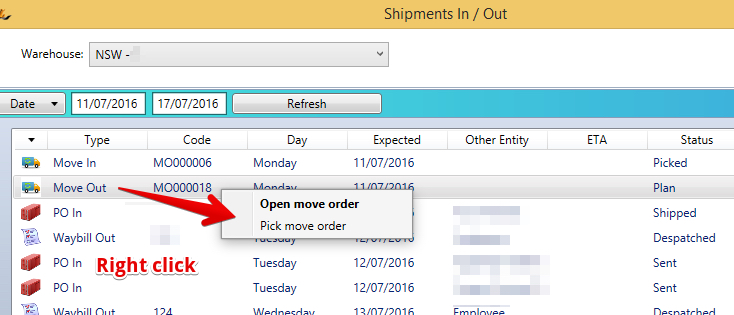
Picking a move order
To Start the Picking Process
Before you start - be aware of the action menu
Expiry date limitations
Are used to limit the stock available to send
Printing picking documents
Use the Action Menu
- Enter all picks
- Action "Mark as picked all lines in picking status" (either line by line or overall)
- Lines that have not been picked yet (short picks for example) will still be on the top of the screen -
 cannot enter CON Note number until these lines have been cancelled
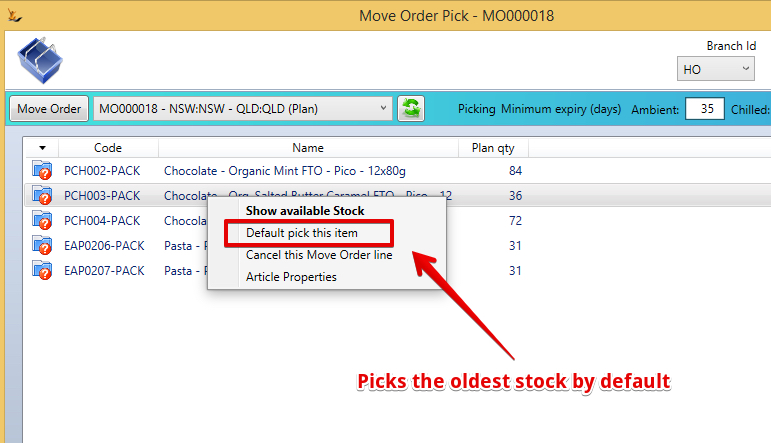
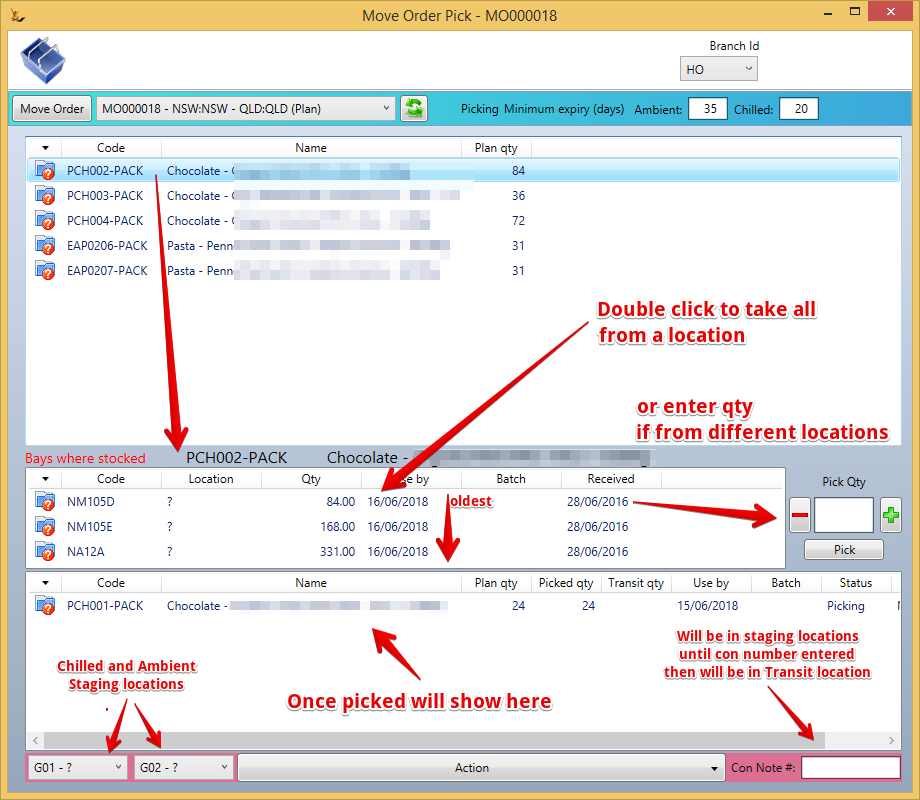
Can use Default pick logic (Oldest first)
Can Pick each line individually
As each stock line is picked the stock is moved to the inTransit location
Move order status is updated by the status of the stock items (will not be picked until all are status picked).
Can add items if status is still plan, picking or picked.
If all items are either Cancelled or Picked - can use Action menu to set to Transit Status (all lines will also change to transit and shipped qty will be updated)
Any line that is picking or picked can be unpicked - stock will return to the location it was picked from.
Right click to cancel any line if required (for example to mark move order to transit). Cannot unpick once in transit status.
Once in Transit status - can print delivery docket.
Once in Transit - can roll back to pick status.
If want to roll back completely - move back to pick status - manually unpick each line until all are unpicked - will have option to cancel.
Entering CON Note Number
Can enter CON note number any status from Plan to in Transit - but must be entered before it can be received.
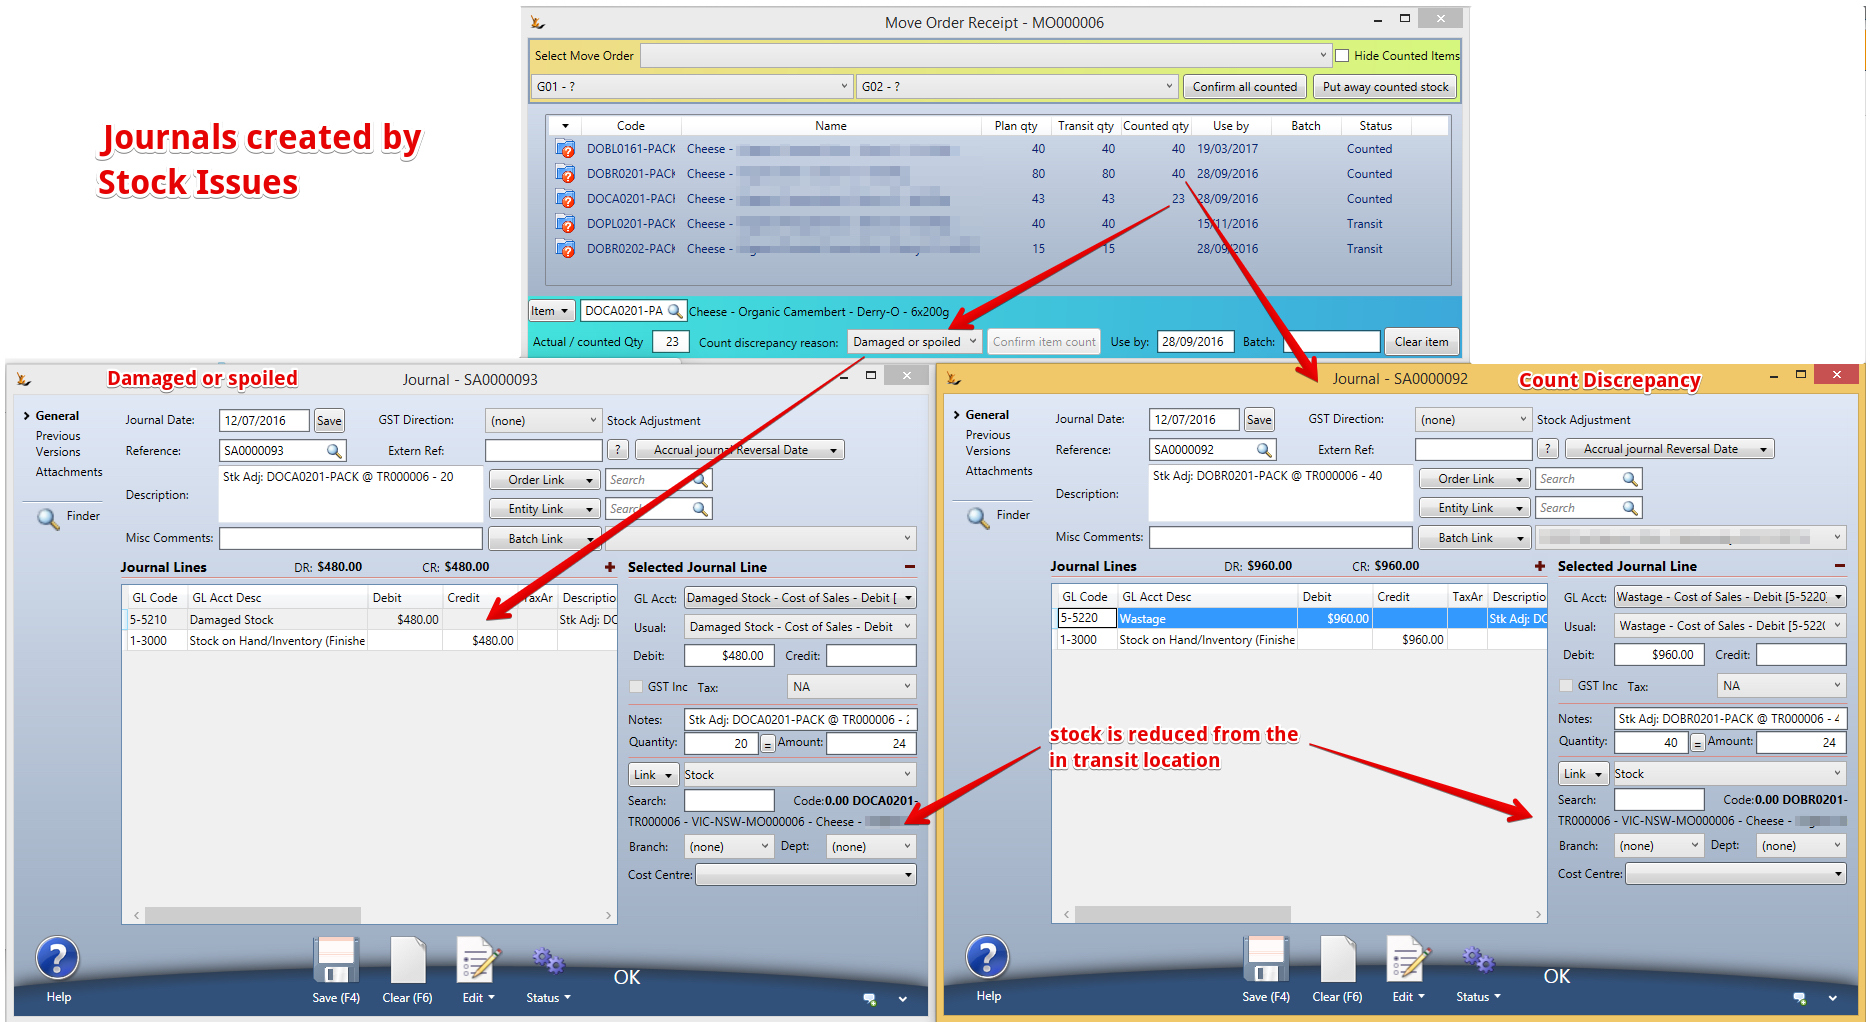
The in-transit stock location is only visible while the stock is in transit
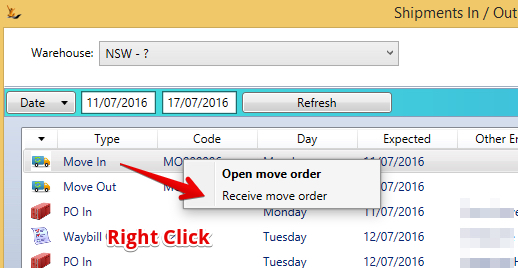
Move orders to be received
Entering the expected time to facilitate planning the day in the warehouse
CON note number must be entered before stock can be received
Counting the receipt to floor area
Damaged stock write offs
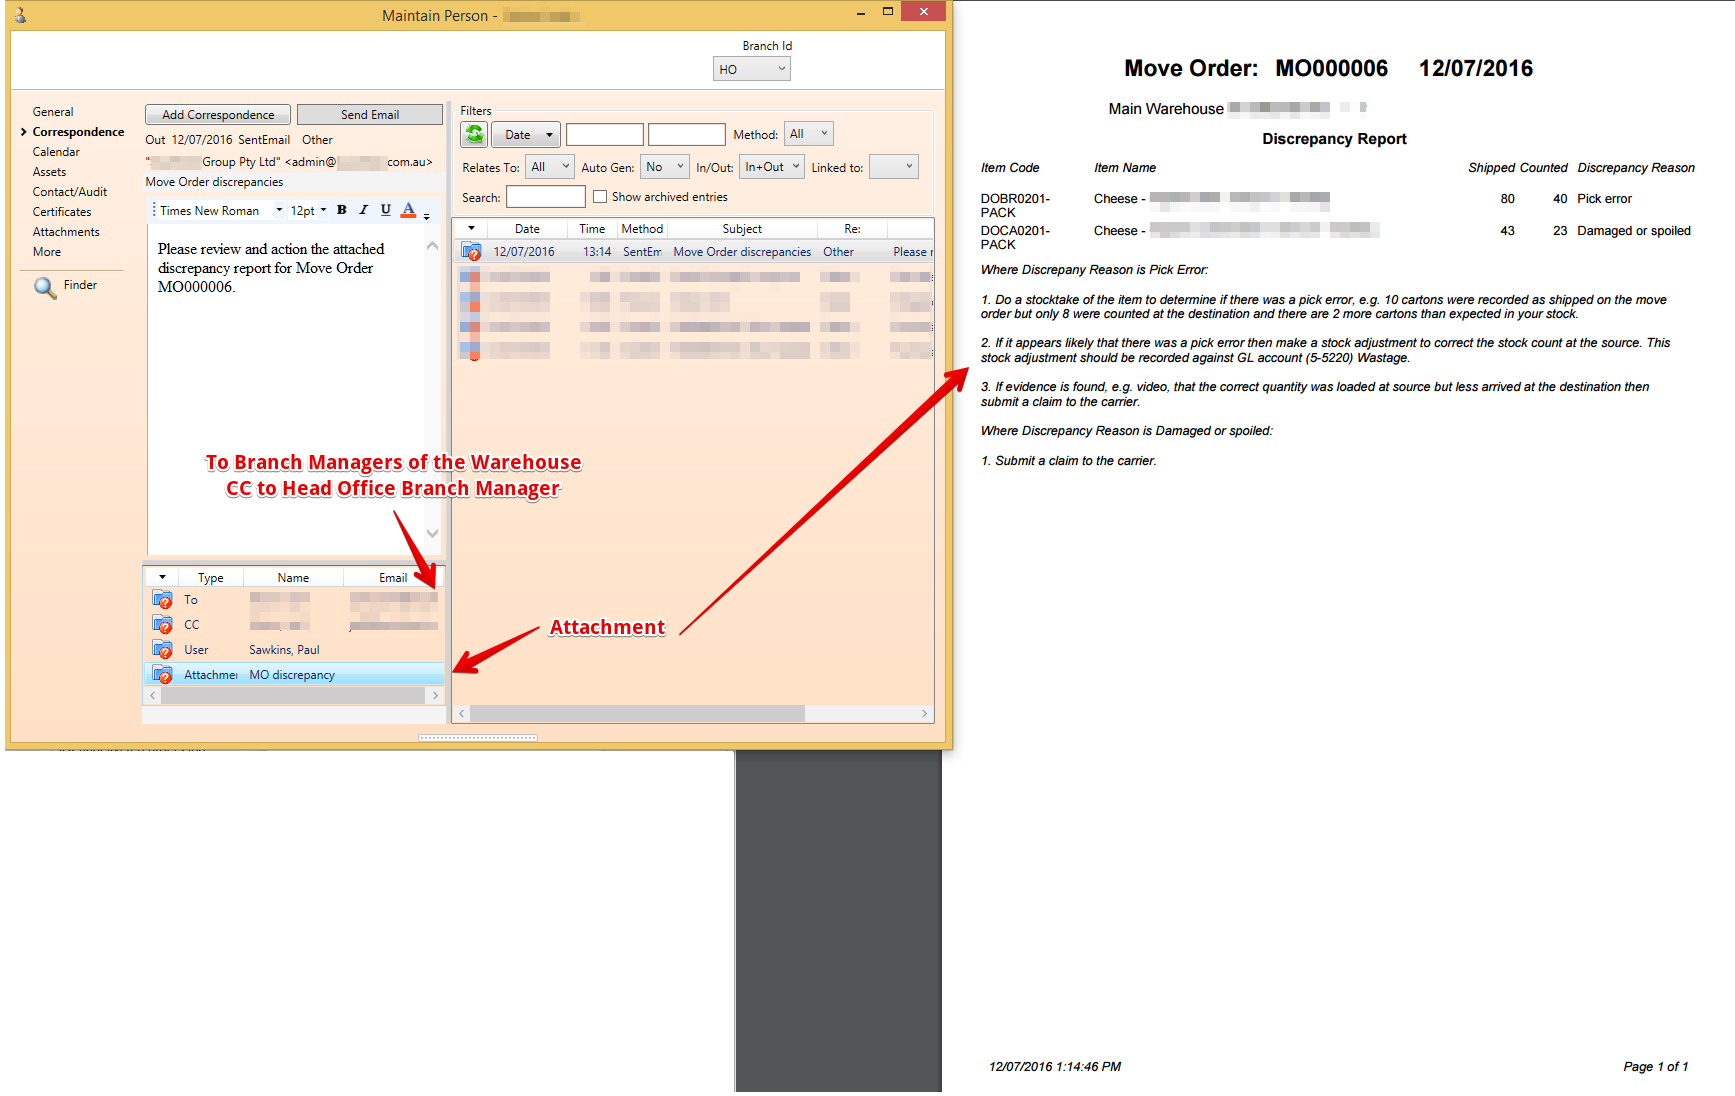
An Automatic email will be sent of the move order discrepancies once count is completed
Discrepancy report is emailed to Branch Managers
Putting the stock away
Related articles
